· deepdives · 7 min read
Harnessing the Future: A Beginner's Guide to the Web Serial API
Learn how to connect to serial devices directly from the browser. This beginner-friendly guide walks you through setup, permission flow, reading/writing data, and a full example project you can run locally.
What you’ll achieve
In 30–60 minutes you’ll be able to connect a microcontroller or serial device to a web page, send commands, read responses, and gracefully handle disconnects. Short on setup. Big on outcome. By the end you’ll have a working demo you can expand into device dashboards, firmware tools, or hardware debugging UIs.
Why this matters (fast)
Web apps used to be confined to the network. Now they can talk directly to hardware. That removes friction for prototyping, demos, and even production tooling - all without installing native apps.
This guide shows the essentials of the Web Serial API, practical code you can run, and what to watch out for as you move from prototype to product.
Prerequisites
- A Chromium-based browser (Chrome, Edge, or a Chromium build) with Web Serial support enabled. See browser support below.
- A serial device (USB-to-serial adapter, Arduino, ESP32, etc.).
- Basic knowledge of JavaScript and how to run a local dev server (see quick server options below).
Useful references:
- Web Serial API (MDN): https://developer.mozilla.org/en-US/docs/Web/API/Serial
- Web.dev tutorial: https://web.dev/serial/
- WICG spec: https://wicg.github.io/serial/
Quick concept map (two-minute read)
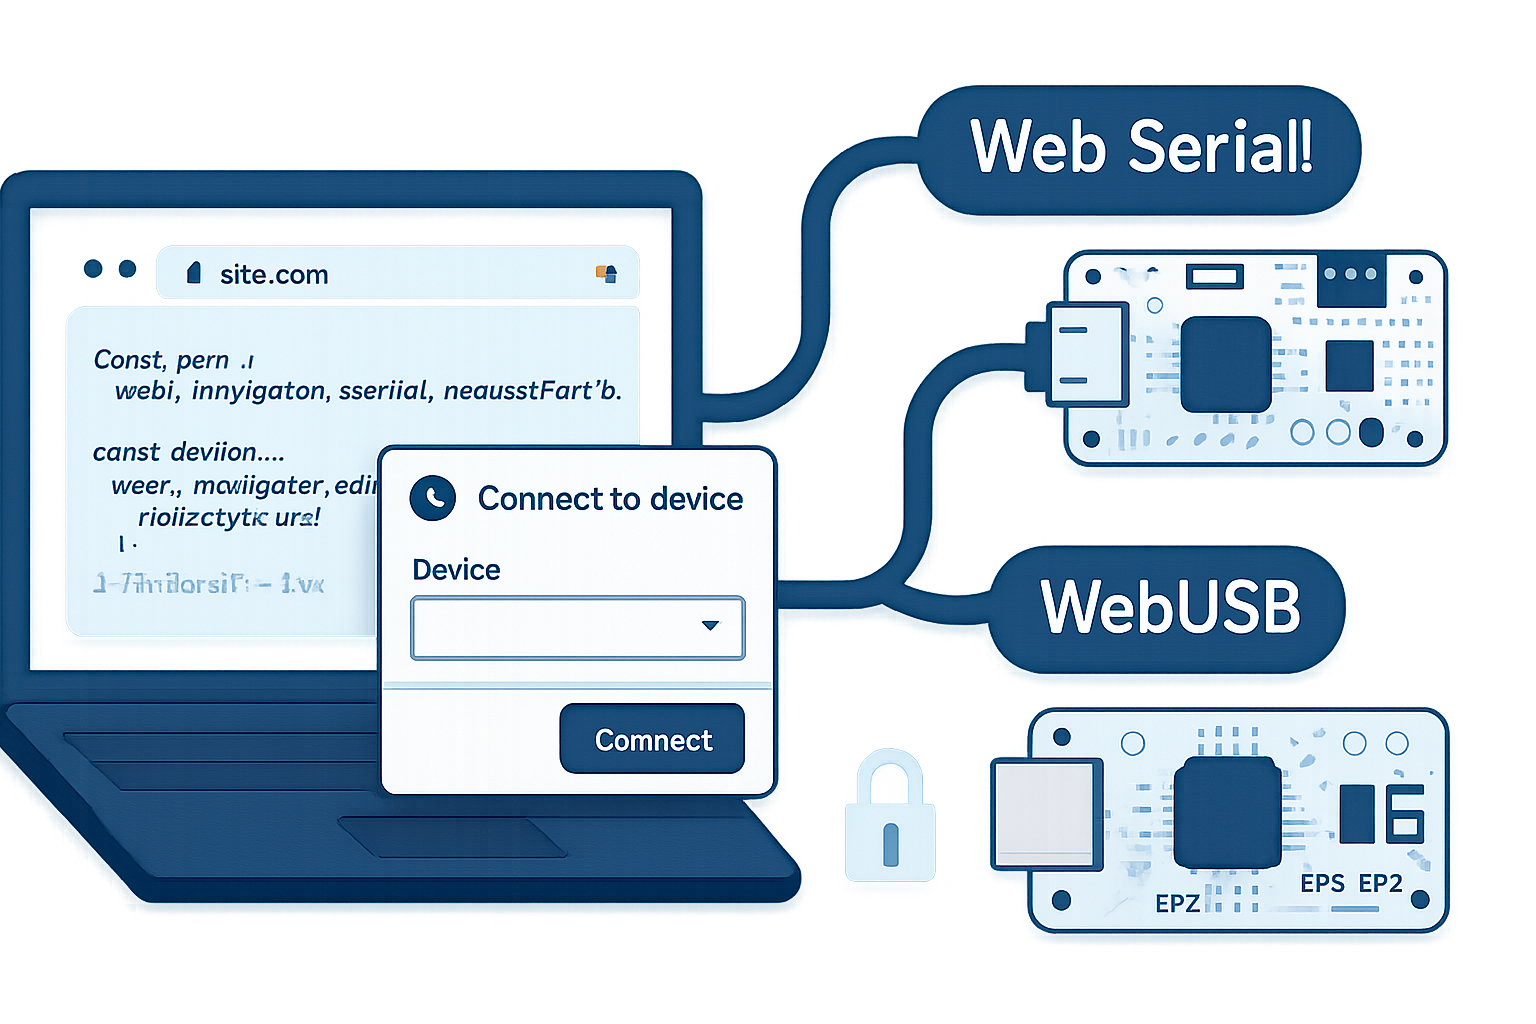
- navigator.serial: entry point for the API.
- requestPort(): prompts the user to select a device and grants access.
- open(options): opens the connection (baud rate, data bits, parity, etc.).
- readable / writable streams: used to read from and write to the device.
- getPorts(): returns previously authorized ports without re-prompting.
Security note: This API requires a secure context (HTTPS or localhost) and explicit user permission.
Project: Simple Serial Terminal (what you’ll build)
A minimal app that:
- Lets the user pick a serial device.
- Opens the connection with a chosen baud rate.
- Displays incoming data in a console area.
- Sends typed commands to the device.
- Handles disconnects cleanly.
Follow the steps below to set it up and run it locally.
Step-by-step project setup
- Create a folder for the project and add two files:
index.htmlandapp.js. - Use a local server. Browsers require a secure context for the Serial API. Quick options:
- Python 3:
python -m http.server 8000 - Node:
npx http-server -c-1(ornpx serve) - Or use HTTPS for a hosted site.
- Python 3:
- Open the site at
http://localhost:8000(orhttps://your-domain). - Connect your device and select it when prompted.
Minimal working example
index.html
<!doctype html>
<html>
  <head>
    <meta charset="utf-8" />
    <meta name="viewport" content="width=device-width,initial-scale=1" />
    <title>Serial Terminal</title>
    <style>
      body {
        font-family:
          system-ui,
          Segoe UI,
          Roboto,
          Arial;
      }
      #log {
        white-space: pre-wrap;
        background: #111;
        color: #0f0;
        padding: 10px;
        height: 200px;
        overflow: auto;
      }
    </style>
  </head>
  <body>
    <h2>Serial Terminal</h2>
    <label>Baud: <input id="baud" type="number" value="9600" /></label>
    <button id="connect">Connect</button>
    <button id="disconnect" disabled>Disconnect</button>
    <div id="log"></div>
    <input
      id="cmd"
      placeholder="Type command and press Enter"
      style="width:100%"
    />
    <script src="app.js"></script>
  </body>
</html>
app.js
const connectButton = document.getElementById('connect');
const disconnectButton = document.getElementById('disconnect');
const log = document.getElementById('log');
const cmdInput = document.getElementById('cmd');
const baudInput = document.getElementById('baud');
let port;
let reader;
let writer;
let keepReading = false;
function appendLog(line) {
log.textContent += line + '\n';
log.scrollTop = log.scrollHeight;
}
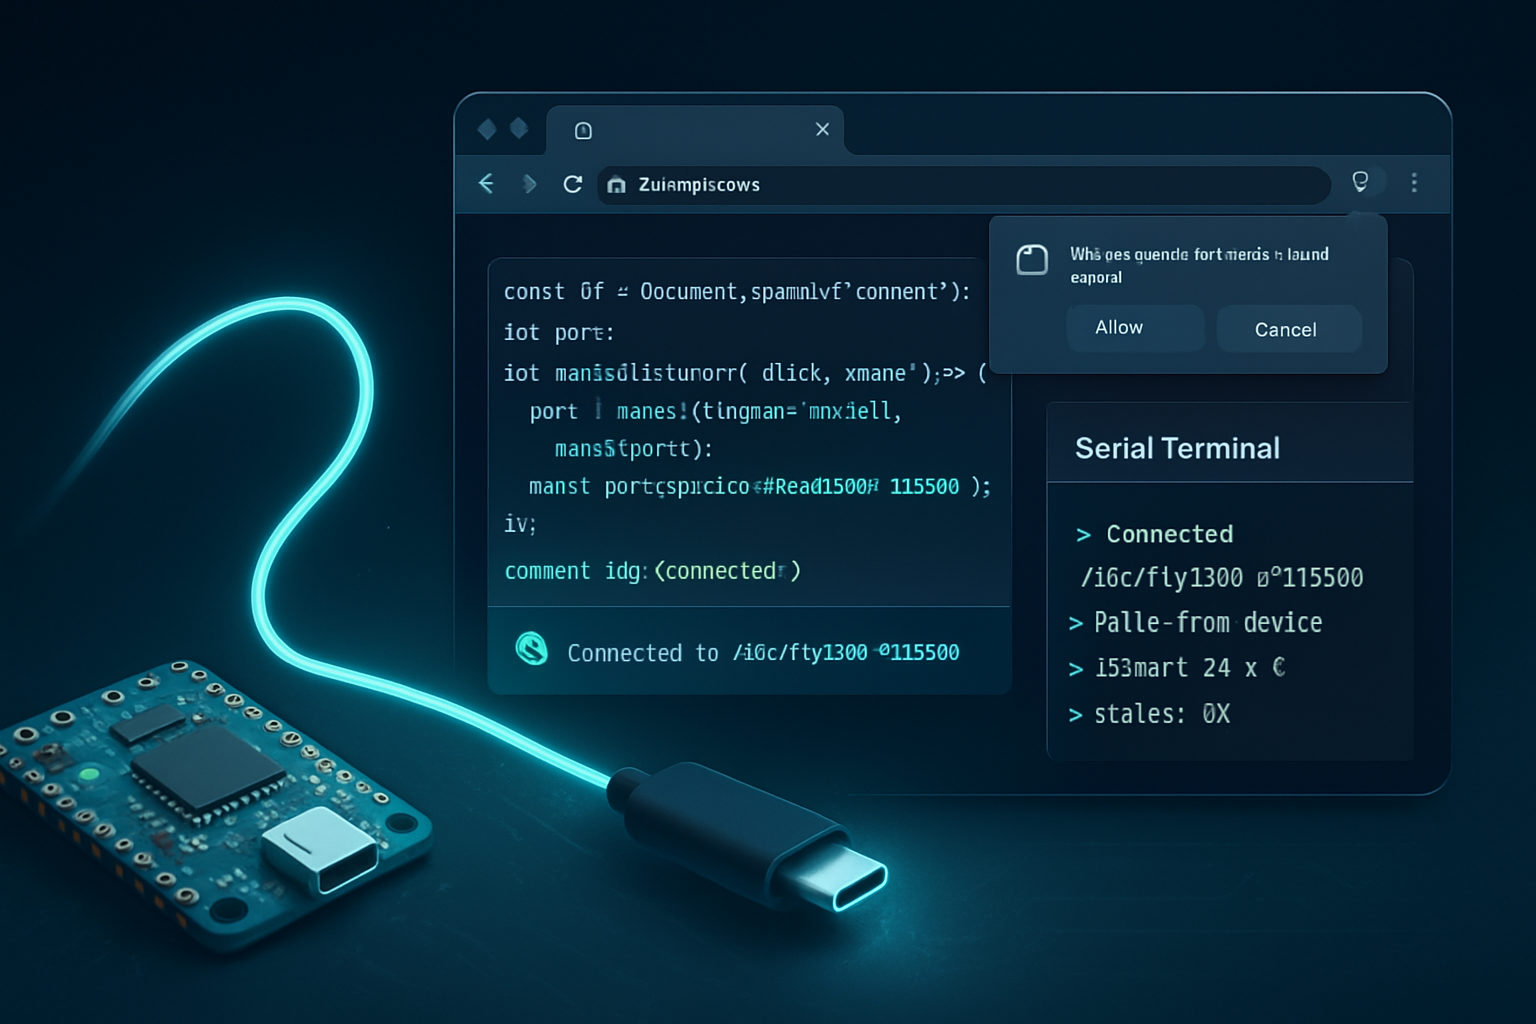
async function connect() {
try {
// Ask user to choose a port.
port = await navigator.serial.requestPort();
// Open with given options.
await port.open({
baudRate: Number(baudInput.value),
dataBits: 8,
stopBits: 1,
parity: 'none',
flowControl: 'none',
});
appendLog('Serial port opened.');
// Setup writable stream for sending data.
const encoder = new TextEncoderStream();
encoder.readable.pipeTo(port.writable);
writer = encoder.writable.getWriter();
// Setup reader for incoming data. Use a TextDecoder stream to decode bytes to text.
const decoder = new TextDecoderStream();
port.readable.pipeTo(decoder.writable);
reader = decoder.readable.getReader();
keepReading = true;
readLoop();
connectButton.disabled = true;
disconnectButton.disabled = false;
} catch (err) {
appendLog('Error: ' + err);
}
}
async function readLoop() {
try {
while (keepReading) {
const { value, done } = await reader.read();
if (done) break; // stream closed
if (value) appendLog(value);
}
} catch (err) {
appendLog('Read error: ' + err);
}
}
async function send(text) {
if (!writer) return;
await writer.write(text + '\n');
}
async function disconnect() {
keepReading = false;
try {
if (reader) {
await reader.cancel();
reader.releaseLock();
}
if (writer) {
writer.releaseLock();
}
if (port) {
await port.close();
appendLog('Serial port closed.');
}
} catch (err) {
appendLog('Disconnect error: ' + err);
}
connectButton.disabled = false;
disconnectButton.disabled = true;
}
connectButton.addEventListener('click', connect);
disconnectButton.addEventListener('click', disconnect);
cmdInput.addEventListener('keydown', e => {
if (e.key === 'Enter') {
send(cmdInput.value);
cmdInput.value = '';
}
});
// Optional: re-open previously granted ports without prompting
async function getPreviouslyGrantedPorts() {
const ports = await navigator.serial.getPorts();
if (ports.length) {
appendLog('Previously granted port(s) found.');
// You can choose the first one or present options to the user
// Example: set port = ports[0] and open it.
}
}
getPreviouslyGrantedPorts();Notes about the example:
- We use TextEncoderStream/TextDecoderStream to convert between bytes and strings. This is convenient for human-readable text; for binary protocols you’d work with ArrayBuffer directly.
- The example writes a newline after each command. Modify as needed for your device.
Important API details and options
When opening a port you can pass options:
- baudRate (number) - required.
- dataBits (7 or 8) - default 8.
- parity (“none”, “even”, “odd”) - default “none”.
- stopBits (1 or 2) - default 1.
- flowControl (“none” or “hardware”) - default “none”.
Example:
await port.open({
  baudRate: 115200,
  dataBits: 8,
  stopBits: 1,
  parity: 'none',
  flowControl: 'hardware',
});
You can also pass a filter to requestPort to help users find the correct device (VID/PID). Example filter:
const filters = [{ usbVendorId: 0x2341, usbProductId: 0x0043 }];
const port = await navigator.serial.requestPort({ filters });
The filter is optional. If you don’t pass filters, the browser shows all serial-like devices.
Handling binary protocols
For binary data use the raw readable/writable streams instead of TextEncoder/Decoder:
const reader = port.readable.getReader();
const writer = port.writable.getWriter();
// reader.read() returns {value: Uint8Array, done: boolean}
Be sure to manage backpressure and avoid blocking the main thread in tight loops.
Disconnects and device removal
- Users can physically unplug the device at any time. Your code should catch read/write errors and update the UI.
- Call
reader.cancel()andwriter.releaseLock()beforeport.close()to clean up.
Troubleshooting common problems
- “navigator.serial is undefined”: You’re not in a supported browser or not in a secure context. Use Chromium-based browsers and serve over HTTPS or localhost.
- Permission denied or no device shown: Make sure the device is connected and the browser is allowed to access USB devices. Try replugging the device.
- Data looks garbled: Check baud rate and parity settings. Many devices default to 9600/8-N-1.
Advanced topics (next steps)
- Multiplexing data: Add framing or packet protocols so messages don’t interleave.
- Binary parsing: Use DataView on ArrayBuffers for efficient numeric parsing.
- Web Workers: Offload heavy parsing to a worker to keep the UI responsive.
- Piping streams: Use
readable.pipeTo()andwritable.getWriter()to build composable transforms. - Integration with WebUSB or Bluetooth where applicable.
Security and privacy considerations
- This API provides direct access to hardware, so browsers require explicit user consent and operate only in secure contexts.
- Treat serial devices as sensitive: don’t expose raw device data to untrusted pages or third-party scripts.
- Respect user expectations - only request ports when necessary and provide clear UI for granting and revoking access.
Browser support
The Web Serial API is available in Chromium-based browsers (Chrome, Edge). For details and updates see the official notes:
- Chromium Developers article: https://developer.chrome.com/articles/serial/
- MDN Web Docs: https://developer.mozilla.org/en-US/docs/Web/API/Serial
Other browsers may not implement it or may implement different permission models. Always feature-detect:
if ('serial' in navigator) {
  // safe to use API
}
Best practices summary
- Serve the app over HTTPS or localhost.
- Prompt the user only when they explicitly take an action (e.g., “Connect” button).
- Use TextEncoder/Decoder for text, ArrayBuffer for binary.
- Handle errors and device removal gracefully.
- Respect privacy: explain what the app will access and why.
Wrapping up
You now have a working pattern to build browser-based serial tools: prompt for a port, open it with correct options, read from the readable stream, write using the writable stream, and clean up on disconnect. From simple terminals to device dashboards and firmware uploaders - the Web Serial API removes friction and speeds iteration.
Start small: get the example running with your device. Then add features like logging, command parsing, and UI controls. The browser is now a powerful platform for hardware interaction - use it responsibly and creatively.
References
- Web Serial API - MDN: https://developer.mozilla.org/en-US/docs/Web/API/Serial
- Introduction and examples - web.dev: https://web.dev/serial/
- WICG Serial specification: https://wicg.github.io/serial/
- Chrome Developers: https://developer.chrome.com/articles/serial/