· deepdives · 10 min read
Building a Game Engine with WebGPU: Step-by-Step Guide
A practical, step-by-step tutorial that teaches you how to build a simple game engine with WebGPU. Learn initialization, WGSL shaders, buffer & texture management, scene structure, draw submission, and key optimizations that make your engine fast and maintainable.
What you’ll build and why it matters
By the end of this guide you’ll have a small, modular game engine core that renders textured meshes with transform hierarchies, supports efficient per-frame updates, and uses WebGPU features and best practices to stay fast. You’ll understand how to manage GPU resources, design a rendering loop, write WGSL shaders, and apply optimizations like instancing, dynamic uniform offsets, and pipeline/bind-group reuse.
This is practical. You’ll get code snippets, architecture notes, and the reasoning behind each choice so you can adapt the engine to your own game.
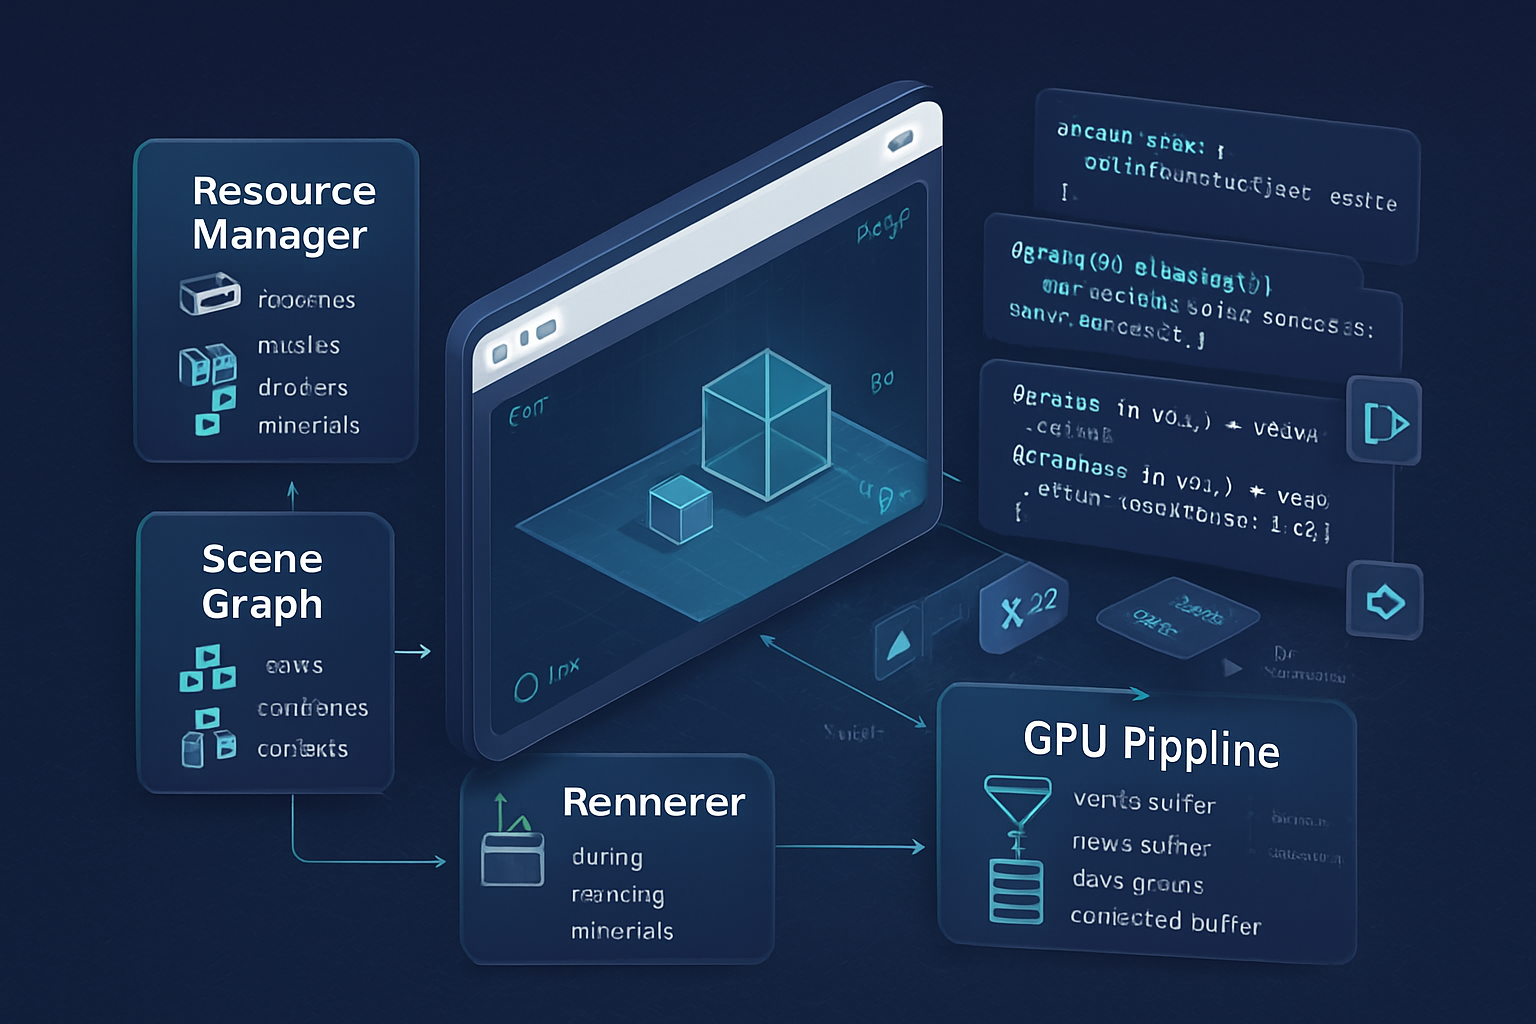
Quick overview: the architecture we’ll implement
- Device + context setup (WebGPU initialization)
- Resource manager (buffers, textures, samplers, pipelines)
- Scene/Entity storage (minimal transform graph + mesh references)
- Renderer (encodes command buffers per frame, performs culling and batching)
- Optimization layer (instancing, dynamic uniform offsets, staging uploads)
We’ll implement each piece incrementally. Read a section, copy the snippet, run it in a browser that supports WebGPU (see setup notes below), and then continue.
Prerequisites and environment
- Use a modern Chrome/Edge or Safari Technology Preview with WebGPU enabled. See the MDN status and instructions: https://developer.mozilla.org/en-US/docs/Web/API/WebGPU_API
- Basic JavaScript/TypeScript knowledge.
- Familiarity with GPU concepts (buffers, shaders, pipeline states) helps but I’ll explain the essential parts.
Helpful references:
- WebGPU specification: https://gpuweb.github.io/gpuweb/
- WGSL shading language overview: https://www.w3.org/TR/WGSL/
- WebGPU learning hub: https://webgpu.io/
1) Initialize WebGPU: adapter, device, and canvas context
Start by requesting an adapter and a device and get the GPUCanvasContext from your canvas element.
async function initWebGPU(canvas) {
  if (!navigator.gpu) throw new Error('WebGPU not supported on this platform');

  const adapter = await navigator.gpu.requestAdapter();
  if (!adapter) throw new Error('Failed to get GPU adapter');

  // Request a device; consider requesting requiredFeatures if you need them.
  const device = await adapter.requestDevice();

  const context = canvas.getContext('webgpu');

  const presentationFormat = navigator.gpu.getPreferredCanvasFormat();

  context.configure({
    device,
    format: presentationFormat,
    alphaMode: 'opaque',
  });

  return { device, context, presentationFormat };
}
Notes:
- getPreferredCanvasFormat returns a format supported on the platform. Use it for swapchain consistency.
- Check device.limits and device.features to adapt behavior for lower-end devices.
2) Simple render loop and command submission
A typical frame encodes commands into a GPUCommandEncoder, creates a render pass descriptor using the current swap chain texture, and submits the command buffer.
function frame(device, context, presentationFormat, drawCallback) {
  const commandEncoder = device.createCommandEncoder();

  const textureView = context.getCurrentTexture().createView();

  const renderPass = commandEncoder.beginRenderPass({
    colorAttachments: [
      {
        view: textureView,
        clearValue: { r: 0.1, g: 0.12, b: 0.15, a: 1 },
        loadOp: 'clear',
        storeOp: 'store',
      },
    ],
  });

  drawCallback(renderPass);

  renderPass.end();

  const commandBuffer = commandEncoder.finish();
  device.queue.submit([commandBuffer]);
}

// Usage with requestAnimationFrame
n = 0;
function loop() {
  frame(device, context, format, pass => {
    // issue draw calls here
  });
  requestAnimationFrame(loop);
}
requestAnimationFrame(loop);
Important: keep per-frame allocations minimal. Reuse encoders, buffers, and bind-groups where possible.
3) Shaders: WGSL basics
WGSL is the shading language for WebGPU. A minimal vertex + fragment pipeline for textured geometry:
// vertex.wgsl
struct Uniforms {
  viewProj : mat4x4<f32>;
};

@binding(0) @group(0) var<uniform> uniforms : Uniforms;

struct VertexInput {
  @location(0) position : vec3<f32>;
  @location(1) uv : vec2<f32>;
};

struct VertexOutput {
  @builtin(position) Position : vec4<f32>;
  @location(0) fragUV : vec2<f32>;
};

@vertex
fn vs_main(in: VertexInput) -> VertexOutput {
  var out : VertexOutput;
  out.Position = uniforms.viewProj * vec4<f32>(in.position, 1.0);
  out.fragUV = in.uv;
  return out;
}

// fragment.wgsl
@binding(1) @group(0) var myTexture : texture_2d<f32>;
@binding(2) @group(0) var mySampler : sampler;

@fragment
fn fs_main(in: VertexOutput) -> @location(0) vec4<f32> {
  let t = textureSample(myTexture, mySampler, in.fragUV);
  return t;
}
Create shader modules with device.createShaderModule({code}) and use them in pipeline creation.
4) Creating pipelines, bind groups, and layouts
Pipelines encapsulate shader code and fixed-function state. Bind group layouts describe how resources (uniforms, textures, samplers) are bound.
const pipeline = device.createRenderPipeline({
  layout: 'auto', // or provide an explicit pipeline layout
  vertex: {
    module: device.createShaderModule({ code: vertexWGSL }),
    entryPoint: 'vs_main',
    buffers: [
      {
        arrayStride: 5 * 4, // vec3 position + vec2 uv
        attributes: [
          { shaderLocation: 0, offset: 0, format: 'float32x3' },
          { shaderLocation: 1, offset: 12, format: 'float32x2' }
        ]
      }
    ]
  },
  fragment: {
    module: device.createShaderModule({ code: fragmentWGSL }),
    entryPoint: 'fs_main',
    targets: [{ format: presentationFormat }]
  },
  primitive: { topology: 'triangle-list', cullMode: 'back' }
});

// Bind-group creation (example):
const uniformBuffer = device.createBuffer({
  size: 256, // align to device.limits.minUniformBufferOffsetAlignment
  usage: GPUBufferUsage.UNIFORM | GPUBufferUsage.COPY_DST
});

const texture = /* created elsewhere */;
const sampler = device.createSampler({ magFilter: 'linear', minFilter: 'linear' });

const bindGroup = device.createBindGroup({
  layout: pipeline.getBindGroupLayout(0),
  entries: [
    { binding: 0, resource: { buffer: uniformBuffer } },
    { binding: 1, resource: texture.createView() },
    { binding: 2, resource: sampler }
  ]
});
Notes:
- Using layout: ‘auto’ simplifies pipeline creation. For more control (and potential reuse), create explicit layouts.
- Bind groups are immutable; changing resources requires creating a new bind group or using dynamic buffers/offsets.
5) Vertex and index buffers: layout and upload strategies
Keep mesh data in GPU buffers. Use GPUBufferUsage.VERTEX and GPUBufferUsage.INDEX. For dynamic data (frequently updated), use COPY_DST and update with device.queue.writeBuffer.
// Upload static mesh data
const vertexBuffer = device.createBuffer({
  size: vertices.byteLength,
  usage: GPUBufferUsage.VERTEX | GPUBufferUsage.COPY_DST,
  mappedAtCreation: true,
});
new Float32Array(vertexBuffer.getMappedRange()).set(vertices);
vertexBuffer.unmap();

// For dynamic updates every frame (e.g. morph targets), keep a CPU-side typed array and call:
// device.queue.writeBuffer(dynamicBuffer, 0, data.buffer, data.byteOffset, data.byteLength);
Avoid mapping/unmapping a buffer per frame; prefer queue.writeBuffer for small updates. For large uploads, create a staging buffer with MAP_WRITE and use copyBufferToBuffer.
6) Uniforms and dynamic offsets
Uniform buffers in WebGPU must respect device.limits.minUniformBufferOffsetAlignment (often 256). To reduce the number of bind groups you create, pack per-object uniforms (model matrices) into a single large uniform buffer and use dynamic offsets.
const perObjectSize = 64; // mat4<f32> = 16 * 4 = 64 bytes
const align = device.limits.minUniformBufferOffsetAlignment; // e.g. 256
function alignTo(n, alignment) {
  return Math.ceil(n / alignment) * alignment;
}
const stride = alignTo(perObjectSize, align);
const maxObjects = 1000;
const uniformStorage = device.createBuffer({
  size: stride * maxObjects,
  usage: GPUBufferUsage.UNIFORM | GPUBufferUsage.COPY_DST,
});

const bindGroupLayout = device.createBindGroupLayout({
  entries: [
    {
      binding: 0,
      visibility: GPUShaderStage.VERTEX,
      buffer: { type: 'uniform', hasDynamicOffset: true },
    },
    {
      binding: 1,
      visibility: GPUShaderStage.FRAGMENT,
      texture: {},
    },
    {
      binding: 2,
      visibility: GPUShaderStage.FRAGMENT,
      sampler: {},
    },
  ],
});

// Create a bind group that references the big uniform buffer with dynamicOffset support
const bindGroup = device.createBindGroup({
  layout: bindGroupLayout,
  entries: [
    { binding: 0, resource: { buffer: uniformStorage, size: stride } },
    { binding: 1, resource: texture.createView() },
    { binding: 2, resource: sampler },
  ],
});

// During draw:
const offsets = [objectIndex * stride];
pass.setBindGroup(0, bindGroup, offsets);
This avoids creating one bind group per object and reduces CPU-side work.
7) Textures: uploading and sampling
Loading textures efficiently matters. Use createImageBitmap and copyExternalImageToTexture when supported to avoid expensive CPU copies:
async function createTextureFromImage(device, image) {
  const bitmap = await createImageBitmap(image);
  const texture = device.createTexture({
    size: [bitmap.width, bitmap.height, 1],
    format: 'rgba8unorm',
    usage:
      GPUTextureUsage.TEXTURE_BINDING |
      GPUTextureUsage.COPY_DST |
      GPUTextureUsage.RENDER_ATTACHMENT,
  });
  device.queue.copyExternalImageToTexture(
    { source: bitmap },
    { texture: texture },
    [bitmap.width, bitmap.height]
  );
  return texture;
}
If you must upload raw pixel data, use a staging buffer and copyBufferToTexture. For mipmaps, WebGPU does not provide automatic mipmap generation - you can use a compute shader or render-to-texture passes to generate them.
8) Resource manager pattern (simple implementation)
Make a ResourceManager that caches created GPU resources and allows reuse. This reduces creation churn, especially for pipelines and samplers.
class ResourceManager {
  constructor(device) {
    this.device = device;
    this.pipelineCache = new Map();
    this.textureCache = new Map();
  }

  getPipeline(key, createFn) {
    if (!this.pipelineCache.has(key)) this.pipelineCache.set(key, createFn());
    return this.pipelineCache.get(key);
  }

  getTexture(key, createFn) {
    if (!this.textureCache.has(key)) this.textureCache.set(key, createFn());
    return this.textureCache.get(key);
  }
}
Cache keys can be strings derived from mesh format, shader names, and render states.
9) Scene structure and draw submission
Keep a minimal scene graph: nodes with local transforms, references to mesh and material. Flatten the graph every frame to produce per-object world transforms, then upload to the uniform buffer.
During traversal, perform frustum culling (optional) and grouping by pipeline/material. Grouped draws reduce pipeline and bind-group switches.
Pseudo draw flow:
- Build visibleList = []
- For each visible object: compute model matrix, write into uniform staging array
- After all writes, upload uniform staging array once with queue.writeBuffer
- In the render pass: for each batch (same pipeline/material): set pipeline, set bind group(s) (with dynamic offsets), set vertex/index buffers, drawIndexed or drawIndexedIndirect
10) Instancing
Instancing reduces draw call count when you render many identical meshes. Provide per-instance data as a vertex buffer with stepMode: ‘instance’.
// Vertex input: add instance attributes
const instanceBufferLayout = {
  arrayStride: 16 * 4, // mat4 per instance (or 4 * vec4)
  stepMode: 'instance',
  attributes: [
    { shaderLocation: 2, offset: 0, format: 'float32x4' },
    { shaderLocation: 3, offset: 16, format: 'float32x4' },
    { shaderLocation: 4, offset: 32, format: 'float32x4' },
    { shaderLocation: 5, offset: 48, format: 'float32x4' },
  ],
};

// When drawing
pass.setVertexBuffer(1, instanceBuffer);
pass.drawIndexed(indexCount, instanceCount);
Consider storing just per-instance transforms and small per-instance data in a structured buffer and use a compute pass to cull/compact instances before drawing.
11) Optimization strategies tailored for WebGPU
- Batch state changes: group draws by pipeline and material.
- Use dynamic uniform offsets: reduces number of bind groups.
- Reuse pipelines and bind group layouts: pipeline creation can be expensive.
- Minimize per-frame allocations: reuse buffers, arrays, and temporary objects.
- Prefer device.queue.writeBuffer for small, frequent updates. For very large uploads, use MAP_WRITE staging buffers plus copyBufferToBuffer.
- Use GPUBufferUsage.COPY_DST and avoid mapping for data you send from CPU every frame.
- Use instancing to draw many identical objects with a single draw call.
- Respect alignment rules: align uniform offsets to device.limits.minUniformBufferOffsetAlignment.
- Profile early: different drivers have different performance characteristics. Keep expensive pipelines to a minimum and avoid forcing pipeline recompiles.
Advanced options:
- Use indirect draw buffers (GPUBufferUsage.INDIRECT) and a compute shader for GPU-driven culling and batching.
- Render passes: use secondary command encoders (not yet supported uniformly) or split rendering into multiple passes to improve locality.
- Use timestamp or occlusion queries if supported to gather GPU timings.
12) Debugging and profiling tips
- Validate shader types and bindings: mismatched binding indices and types between WGSL and bind groups cause runtime errors.
- Console logs might not show GPU errors; enable browser GPU validation flags or use Chrome’s chrome://gpu page.
- Keep a small test scene to isolate performance regressions.
- Use GPU timing queries (if available) to measure actual GPU time.
13) Putting it together: minimal engine skeleton
A high-level view of modules and responsibilities:
- core/init.js - WebGPU initialization and context configuration
- core/resourceManager.js - pipeline, texture, sampler caches
- core/renderer.js - render loop, render graph, batching
- core/mesh.js - mesh creation, vertex/index buffer management
- core/scene.js - entity graph and traversal
- core/shaders/ - WGSL shader modules
Keep code modular so you can swap renderers (forward, clustered, deferred) and experiment safely.
Example: full minimal draw flow (pseudo)
// 1. init
const { device, context, presentationFormat } = await initWebGPU(canvas);
const rm = new ResourceManager(device);

// 2. create pipeline & resources
const pipeline = rm.getPipeline('textured', () =>
  createTexturedPipeline(device, presentationFormat)
);
const texture = await createTextureFromImage(device, image);
const sampler = device.createSampler({ magFilter: 'linear' });

// 3. per-frame
function renderFrame() {
  // update transforms into a Float32Array
  device.queue.writeBuffer(uniformStorage, 0, transformArray.buffer);

  frame(device, context, presentationFormat, pass => {
    pass.setPipeline(pipeline);
    pass.setBindGroup(0, bindGroup, [dynamicOffsetForThisObject]);
    pass.setVertexBuffer(0, vertexBuffer);
    pass.setIndexBuffer(indexBuffer, 'uint16');
    pass.drawIndexed(indexCount, instanceCount);
  });
}
This skeleton is intentionally small - the real work is in packing and updating resources efficiently and reducing CPU/GPU synchronization.
Where to go next
- Add a compute-driven culling stage to create a compact indirect draw buffer.
- Implement skeletal animation: skin matrices uploaded as storage buffers and applied in the vertex shader.
- Try a deferred renderer: store G-buffer textures (positions/normals/albedo) and do lighting in a full-screen pass.
- Integrate with glTF or a custom mesh pipeline for real assets.
Further reading and examples:
- WebGPU spec and primers: https://gpuweb.github.io/gpuweb/ and https://webgpu.io/
- MDN WebGPU docs: https://developer.mozilla.org/en-US/docs/Web/API/WebGPU_API
- wgpu (Rust) examples for advanced patterns: https://github.com/gfx-rs/wgpu
Final thoughts
WebGPU is the new low-level graphics API on the web: more explicit than WebGL, but much closer to modern GPU programming models. Build small, measure often, and structure your engine around resource reuse and minimal per-frame churn. Start with the pipeline, resource manager, and a compact draw path - then iterate with profiling-driven optimizations. Follow the principles above and you can evolve this small engine into a performant renderer that takes advantage of the full power of the GPU.